Saturday, May 25, 2013

Mother's Tea 2012

Every year our MOMS Club plans a Mother's Day Tea and Fundraiser. All our members and their mothers are invited to attend and raise money for local charities.

It's a great way to honor ourselves and our friends that encourage and inspire us.

2012 was my 2nd year planning the decor for the party.

The theme for 2012 was Moms Who Play Together, Grow Together.


It all started with the design of a sign. I then created about a million watering cans to use as raffle boxes for each item.


NAME TAGS
 Flower pin name tags were created by cutting out four scalloped circles, scrunching up the paper and separating the cardstock in half. It gave the "petals" a really soft texture. The ladies wrote their names on the tags but could then throw that part away after the party and keep the pin to decorate a purse, etc.
 BANNER
This Tea Party banner was actually created for the Alice in Wonderland Tea in 2011 Link but since I used the same paper pack it fit in perfectly.

 These are the watering cans set up for the event. Each was labeled with the item. 
Because they were a bit labor intensive, I also created a simpler butterfly box. 
We also had bid sheets for the silent auction to match.
 Our President created this photo display and used it at a National MOMS Club function earlier in the year.
Paper products can really dress up an event. 

THE FAVORS


One of our members came up with this idea so one afternoon we got together and created pull tab cans filled with peanut M&Ms. The moms thought they were great. Basically using a can opener that doesn't cut the ridge, we emptied out 35 or so fruit cocktail cans. Washed and dried the cans. Filled them, placed a piece of tissue paper, then hot glued the bottom of the can back on. Added labels that I created to match our decor and then tied two coordinating ribbons on top.

Park Talk Printables made donation to raffle (as if cutting 25 watering cans and butterfly boxes wasn't enough work, hee hee).. 

FAMILY GAME NIGHT
I went into my gift closet and found a few family games and jazzed up some snacks. Who doesn't love Popcorn, chocolate chip cookies and Candyland?


Party Favors

Party Favors are always better when they have a personal meaning to the host/hostess. (Isn't everything better when it touches your heart?)..

Deciding on what to send your guests home with can sometimes be a tough decision. It wasn't a tough choice for this special couple's engagement party.

Mahsa's mother made her favorite strawberry and carrot jam for all her guests to enjoy at home. What a great way to honor something you love and share it with others.


Sunday, February 17, 2013

Cookies, Treats, and Bag Toppers

Recently I had a friend ask about making cookies for a party.. I thought I'd share some tips I discovered while making cookies for various events and a way to make ANY treats look special.

I really adore thick cookies.. even if they aren't big, they seem more luxurious than a thin brown cookie you had to scrape off the pan, that are about to crumble at any moment.

After lots of research I found an awesome recipe on the Wilton discussion forums. Forums are dangerous places my friend! I don't even care what the topic is, you can get lost for hours looking at questions and answers for things you weren't even looking for... hence my reason for not fighting off the urge to join Pinterest. (I have since joined the masses but I was strong for a long time!)

Anyhow, my tried and true go to recipe for cookies. It's especially important to know they can be made ahead so you aren't making cookies at 2am the night before the party... ahem, we've all been there with one project or another!

MELISSA'S SUGAR COOKIES

2 sticks of Land of Lakes sweet cream salted butter
1 large egg
1 cup of sugar
vanilla-I don't measure-Just splash it in
Mix until creamy
2 3/4 to 3 cups of plain flour

Bake at 400 for 7 to 8 minutes

Additional notes about these yummy cookies:

MELISSA'S NOTES.........
The dough should not be crumbly -- No need to chill this dough, you can use it from the bowl to rolling out.

I use about 1/3 of the dough at a time to roll -- I don't have luck keeping consistancy with thickness with larger portions -- I try to use all the dough I can, to prevent getting additional flour by using over and over.

Some people find it not sweet enough - That's another benefit for me -- they are more "cakie" -- more like a shortbread type -- I find with the icing, they are so tasty and again "real" butter is a huge factor in taste--I only use Land of Lakes.

I don't like crunchy cookies -- I don't like thin cookies -- I like thick and soft cookies!

Why in the world do you bake at 400? I dont bake much of anything that hot" -- I don't have an explanition, except for That's what I've always bake them at and for that amount of time.

I roll cookies thick -- a good 1/4" + and right on the formica

another note -- use a cookie sheet without sides -- a jelly roll pan or cookie sheet with sides hold the heat -- the cookies next to them will brown faster

I perfer my cookies to be "just barely" done -- they are just set and barely if at all brown --- I don't like browned bottoms for taste or looks -- or hard cookies.

Let them cool competely before decorationg.

I freeze them undecorated for up to 2 months in vacummed sealed containers or tightly sealed -- they freeze very well.

Unfrozen and Packaged in cellophane, they will keep up to 3 weeks -- I've pushed it with 4 -- but definitely 3.

I have this recipe and notes and keep them in my recipe binder. I have used other brands of butter and they're still just as good. I've also added Lemon or Vanilla extra to add a little flavor, both equally delicious.

Here's another trick if you don't have rolling pin spaces.. these are made to keep your dough even. Whenever I try to do it freehand, I always end up with one side of the cookie thinner (and they bake uneven, or there's a dip in the middle- ugly).

POOR GIRL'S ROLLING GUIDE: 
Go to your local hardware store's paint department and ask them for their LARGE paint stir sticks (you'll need two)... Place a ball of dough on a piece of parchment (or wax) paper. Then cover with another piece of the same. Using the paper will mean you aren't using additional flour for rolling.

Place the handle part of the stirring sticks on either side of your dough.. place your rolling pin on top of sticks and start to roll.. your cookie dough will be in between and won't touch the sticks because of the parchment paper.. voila! Your cookies are now about a quarter of an inch think and even on all sides!

Here's another trick.. Fondant always looks gorgeous but can be pretty tasteless. On the same Wilton forum I found a recipe for Marshmallow Fondant... that's right, it's made from mini marshmallows and tastes sweet but rolls out very smooth. If you roll it thin enough, you can stack to create designs.

I usually roll small batches of the fondant so I can make several colors. I use the same cookie cutter I used for the cookie for a base. If you start cutting out your fondant while the cookies are baking, you'll be able to pop them onto the cookies just as they're coming out of the oven.. this will make the fondant melt slightly and adhere to the cookie! They don't get hard but can be put into bags or stacked without worry.


Marshmallow Fondant 

RECIPE FOR SMALL BATCH:
1 cup mini marshmallows
1 tbsp water
1 1/2- 1 3/4 cup powdered sugar
Crisco for rolling/your hands

Place marshmallows in a standard 1 cup measuring cup and push down and pack them in. Place in a microwave safe bowl and add the water. Put in the microwave for about 20 seconds. Just long enough for them to soften and puff up. Take out and stir with a spoon until it is combined well. At this point it looks kind of soupy. Then add the sugar and mix and fold until all is incorporated and it is no longer sticky. I take it out of the bowl when it gets to the point where most of the sugar is incorporated and I knead it in my hands. This takes roughly about 5-7 minutes. Take a fondant roller or a regular rolling pin and roll out just as you would Wilton's fondant. You can get this fondant almost paper thin and it also repairs well. It's cheap, easy to work with, and tastes great too. ***Microwaves times vary so please adjust to your own microwave.

RECIPE FOR LARGE BATCH:
1- 16 oz bag of mini marshmallows
2 tbsp water
7 cups powdered sugar (2 pound bag MINUS 1 cup)

Do the same procedure as above for the small batch.

STICKINESS PROBLEMS?
If it is way to sticky to work with then cut back on the amount of liquid that you used by about 1/2 tsp. This will help. 
Let it sit out and "air dry" for about 10 minutes. 
Use a small amount of Crisco on your work surface, rolling pin, bowl,and hands. A little goes a very long way so don't go over board with the Crisco.
Dust your MMF ball with a powdered sugar poof. You can also use a cornstarch poof but it will tend to dry out the MMF faster.

++Another important point.. even if your goodies don't look as good as the ones "professionals" make, they make a big impact on the person receiving them.. something more special that a package of cookies from a box at Costco.
These were for a MOMS CLUB cookie exchange and had the recipe on the back.. My daughter decorated them, making them extra "sweet".
Cookies.. not perfectly gorgeous but the guests only remembered how good they tasted and the cute bags they came in!

See... imperfect but completely cute with a ribbon and tag tied on the bag!
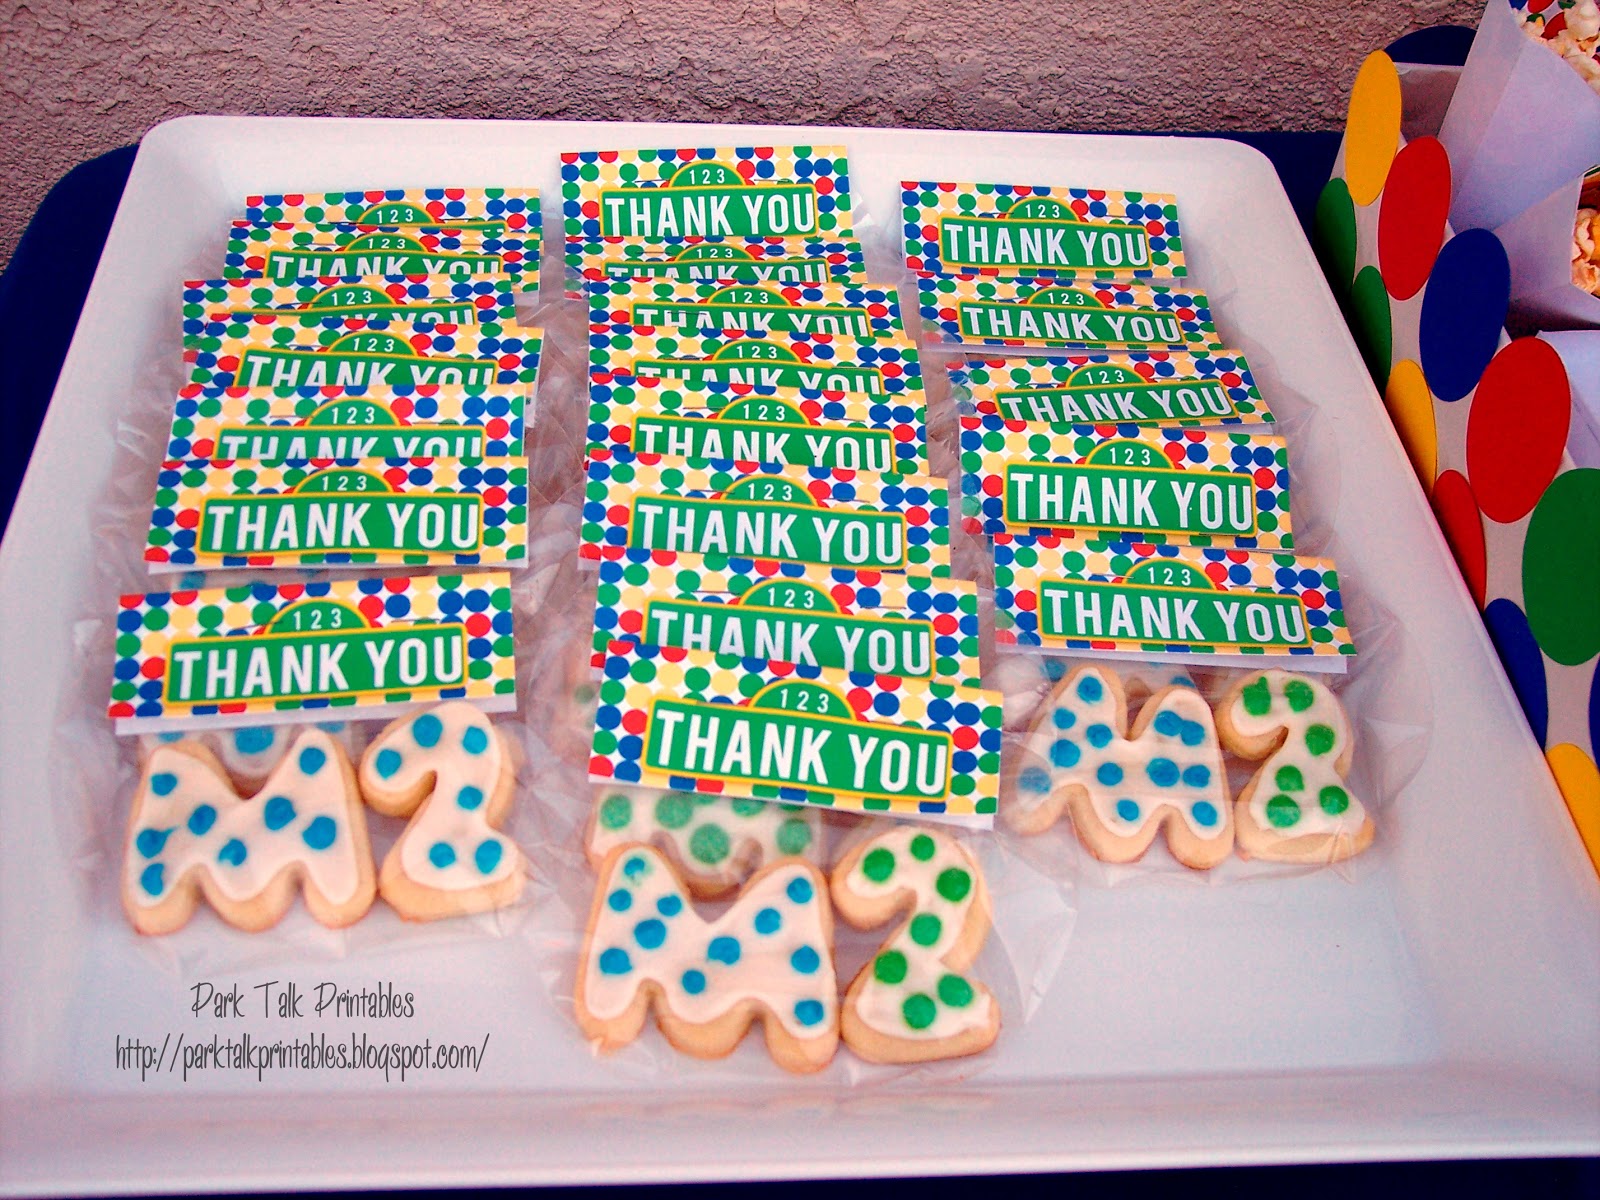
Even if you don't want to make your own goodies.. store bought things look special with a personalized bag topper. These can be used as part of your party favor bags or for snacks during a party.
Family Game Night Snacks made special with individual treat bags
Snacks for hungry hikers during a 60th surprise outdoor party.. even trail mix can be cute!
 Please let me know if Park Talk Printables can help create a topper for your party!
Visit my Etsy Store to contact me or email me today.


Tuesday, June 19, 2012

Easter 2012

It seems like every year we have more and more egg hunts to attend. Not complaining because we have fun at each and every one...we have MOMS Club party, a preschool hunt, the city's Eggstravaganza, and this year we were invited to a friend's family celebration. I didn't want to attend empty handed and I really wanted to use my new cake pop stand so this is what I created. Peeps on a stick!


I wasn't able to find anything green or gummy to use for the carrot tops so I improvised with paper.. they turned out super cute and couldn't have been easier.
I also didn't want to pay for orange sugar.. some sugars you KNOW you'll use again, like red or green but wasn't sure about orange. Instead, I made my own... just took regular white sugar and food coloring.. after mixing to a color I could live with (more of a copper) I spread it out on a cookie sheet to dry... EASY!

I ended up having extra peeps and decided to make a little something for our neighbors.. they're always sharing a wave and a smile and yummy avocados. A few peeps on a stick wasn't a big deal but they really appreciated how cute it was. This would make a cute and inexpensive gift for anyone with a sweet tooth.


Because we were invited to a brunch, I also needed to bring food to share. I found these Bunny Buns online. While I didn't use her recipe, I thought they were adorable! 

Here's my final product... any bread dough will work, but these Butterhorns from Money Saving Mom are a family favorite. For one I did a cinnamon-sugar dusting and the other an orange/butter glaze. I love how puffy their little tails got!


Apparently great minds think alike because my girlfriend brought this cute cake to share. She said it was suppose to look like a sunflower using chick peeps but I think it turned out great as is..


This year's festivities were fun and filled with yummy treats for everyone!


Eat Drink Bowl- Bowling Birthday Party

We've had a very busy past couple of months!

Back in March my super great friend Sarah's husband was going to celebrate his 40th birthday. He's such a fun outgoing guy and she wanted to do something special for such an important milestone.

She came up with a bowling party.. mind you, this was no ordinary bowling party! With the help of Park Talk Printables, she created a fabulous evening that was both sophisticated and fun.
We incorporated Retro Bowling with a modern twist.

Sarah and the Birthday Boy, Scott
The evening started with drinks and dinner at their house. She created an amazing burger bar filled with any and all toppings imaginable. Each bowl had a funny tag that had guests chuckling as they created their burgers.


bowling ball napkin rings were super easy to create.. just black cardstock circles, a white pen and red polka dot ribbon


It's not how you bowl, it's how you roll!
Lots of banners were used to fill up the kitchen, living room and bar spaces.

The bar was very cute. We created a menu for martinis and check out this super cute shot Sarah created.... cute and yummy it was mixture of malibu rum and gelatin.


Turns out Scott is talented in the art of party decor.. he created these cake pop stands... super cute right? If you'd like your own just ask, we're going to start selling them! Look for them shortly in my Esty store.

In one we had cake pops and the other, chocolate dipped marshmallows with colored sugar to match the party decor. The party goers loved them both. A cake pop (or anything on a stick for that matter) is so easy to pick up a bite or two and not have to fuss with your drink or dropping a plate.


As I was saying, the party started at their house but then we rode in a limo to Lucky Strike in Hollywood... bowled a few games and then were taken back to their house. If you've never been there, put it on your list of fun date nights or a special night out with friends. It was perfect for the celebration.

Every once in awhile you think you have a great idea but then forget it during the actual party.... it happens to the best of us! I created these cute bowling pin cookies and covered with fondant. We were going to hand them out at the end of the night in the limo for those late night munchies but alas they were left on the kitchen counter. We ended up picking up a pizza (I'll spare you THOSE photos!) :)


Sarah and Angela enjoying a martini with dry ice

Everyone had a really great time. Sarah knows how to throw a fabulous party and make all her guests feel special. I was glad to be a part of the fun!


Wednesday, March 7, 2012

Sweet Baby Girl Shower- Yellow/Grey/Pink

My sister-in-law's niece and her hubby (Holly and James) are expecting their first baby this month. In January her mom contacted me to help with decor for her baby shower. I was so excited to be a part of her day. We see each other at family functions often and they've always treated my daughter so well, doting on her like a princess. I was happy to see her family grow.

Holly had her nursery painted yellow and grey, such a modern pallet and now that I've done the party I see grey and yellow together all the time. Funny how that happens! Her mom wanted to add a touch of pink to make it a bit "girly". She brought me some napkin samples to match colors and I so the fun began!

The party was being held in their home association's clubhouse.  Bright pops of color are what this party called for. Everyone was so excited to celebrate this sweet baby girl and to "shower" their family with things they'll need, sprinkled with a few luxury items.


Family members created colorful poms to hang next to the "Sweet Baby Girl" banner over the gift table
The little onesie was held on with mini clothes pins

For a beautiful keepsake, guests filled out "Wishes for Baby" cards. (click to enlarge)


So proud of Holly's family. These crafty ladies put together 50+ onesies and booties for favors. I cut them out and they assembled!

Side view of Onesie favor.. has a little box to fill with candies
Party favors on display at each table. I love when favors are used as part of the decor.
Water bottle labels for the occasion. Perfect for guests to take on their drive home or as an alternative to lemonade/ice tea.


All the napkins/utensils were all neatly contained in a cute holder created from card stock wrapped with pink tulle.
The food was from a favorite BBQ place and so delicious!
Simple Gerbera Daisies were prefectly sweet!
Yellow and Pink drinks matched the decor.

Holly and her proud mom, Shari
This "Baby" banner was hung over the cake. The owl is from the Create a Critter Cricut Cartridge.
Everyone had so much fun playing Charades, one of the family's favorite games
Holly's grandma, Edy
Holly and her cake. Simple pink dots and a topper.
I created a simple cake topper with tiny onesies and a sign that matched the fonts on all the other printed items.

Pam (Holly's Aunt) finding the perfect words of wisdom for her "Wishes for Baby" card

Me and my Sister-in-law Alyx. So glad I was invited to join in the fun
Holly and her mom, sisters on each side
Holly celebrating the day with her family

You're sweet baby girl is one lucky lady to be part of such a great family. We can't wait to meet her!